



TL;DR: Build professional full-stack websites using Claude AI and the vibe coding methodology. This complete tutorial covers Claude Projects and Artifacts for multi-component apps, React and Next.js development, database integration, API connections, deployment to Netlify/Vercel, and best practices for AI-assisted web development. No deep coding knowledge required - just clear communication and iteration with Claude. Learn to build everything from landing pages to complete web applications in hours, not weeks.
Building an AI product? Continue with the focused full-stack AI chat app guide for Auth.js login, private chat history, Vercel AI SDK streaming, server-only Claude credentials, and deployment without Stripe.
What is Vibe Coding?
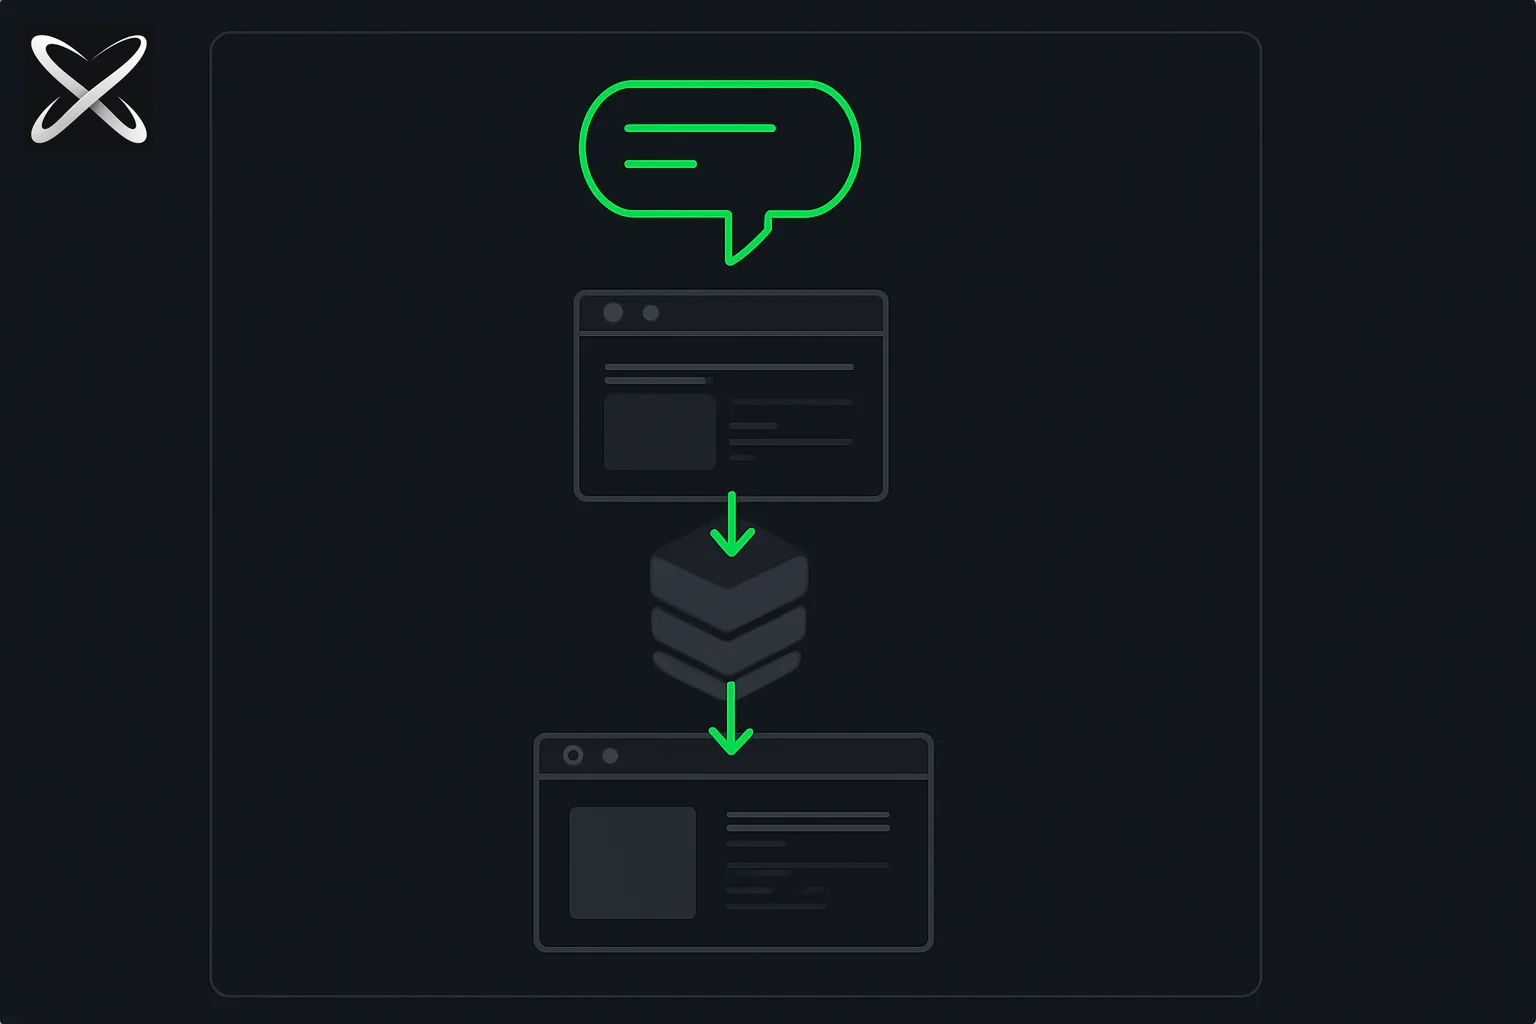
Vibe coding is a revolutionary approach to software development where you describe what you want in plain English and AI writes the code for you.
The Concept
Traditional Coding:
Developer → Learns syntax → Writes code → Debugs → Tests → Deploys
Vibe Coding:
Developer → Describes requirements → AI generates code → Review → Deploy
Who Coined It?
The term "vibe coding" was coined by Andrej Karpathy, former Director of AI at Tesla and co-founder of OpenAI, to describe this new paradigm of AI-assisted development.
Why It Matters
Democratizes Development:
- No need to memorize syntax across multiple languages
- Focus on logic, design, and user experience
- Faster iteration and prototyping
- Lower barrier to entry for non-developers
Enhances Productivity:
- Experienced developers build 10x faster
- Beginners can create production-ready applications
- Rapid A/B testing of different approaches
- AI handles boilerplate and repetitive code
Important Caveat:
"Design thinking, branding, UX strategy, and business logic still require human decision-making. AI is an assistant, not a replacement for learning development fundamentals."
Sources: Bearmybrand Vibe Coding Guide, explainx.ai Claude Code Tutorial
Prerequisites: What You Need
Essential Tools
| Tool | Purpose | Cost |
|---|---|---|
| Claude Pro | Access to Projects and Artifacts | $20/month |
| Web Browser | Chrome, Firefox, or Safari | Free |
| Text Editor | VS Code (optional but recommended) | Free |
| Git | Version control (optional) | Free |
Optional (Recommended)
| Tool | Purpose | Cost |
|---|---|---|
| Domain Name | Custom URL (example.com) | $10-20/year |
| Netlify Account | Free hosting and deployment | Free tier |
| GitHub Account | Code backup and collaboration | Free |
| Figma | Design mockups (optional) | Free tier |
Skills You'll Need
Required (Minimal):
- Basic understanding of websites (what they are, how they work)
- Ability to describe requirements clearly
- Willingness to iterate and refine
Helpful (But Not Required):
- Basic HTML/CSS concepts
- Understanding of web structure (header, footer, sections)
- Familiarity with modern web design patterns
You Don't Need:
- Deep programming knowledge
- Framework expertise (React, Vue, etc.)
- Backend development experience
- Database administration skills
Claude handles all the technical implementation - you provide the vision and requirements.
Understanding Claude Projects & Artifacts
Claude Projects
What Are Projects? Claude Projects allow you to organize multi-file, complex applications with persistent context and knowledge.
Key Features:
- Multi-file support: Work with multiple files simultaneously
- Persistent context: Claude remembers previous conversations
- Knowledge base: Upload documentation, style guides, APIs
- Collaborative: Share projects with team members (Team/Enterprise plans)
When to Use Projects:
- Building complex multi-page websites
- Full-stack applications with multiple components
- Apps requiring consistent styling and structure
- Long-term development spanning multiple sessions
How to Create a Project:
- Log into Claude.ai
- Click "Projects" in sidebar
- Click "New Project"
- Name your project (e.g., "My Portfolio Website")
- Optionally add knowledge files (design docs, API specs)
- Start chatting with project context
Sources: Leon Furze - Building Websites, AI Blew My Mind Tutorial
Claude Artifacts
What Are Artifacts? Interactive code previews that let you see your application running in real-time as Claude generates it.
Supported Artifact Types:
- HTML/CSS/JS: Static web pages with styling and interactivity
- React Components: Single-file React applications
- SVG Graphics: Vector illustrations and diagrams
- Mermaid Diagrams: Flowcharts, architecture diagrams
- Documents: Markdown, formatted text
How Artifacts Work:
You: "Create a landing page for a SaaS product with hero section, features, and pricing"

→ Claude generates HTML/CSS/JS in Artifact
→ Preview appears in real-time
→ You can interact with the preview
→ Request changes: "Make the hero section blue with white text"
→ Claude updates the code instantly
→ Preview refreshes automatically
Limitations:
- Single-file applications (combine HTML/CSS/JS in one file)
- Client-side only (no server-side code in Artifacts)
- Limited to supported frameworks (React via CDN)
- No multi-file projects in Artifacts (use Projects instead)
Best Practices:
- Start with Artifacts for quick prototyping
- Move to Projects when you need multiple files
- Use Artifacts for design iteration and experimentation
- Export Artifact code to your local environment for deployment
Step-by-Step: Building Your First Website
Project 1: Landing Page (Static Site)
Objective: Build a professional landing page for a fictional SaaS product.
Step 1: Define Requirements
Write a detailed prompt describing your vision:
Create a modern landing page for "TaskFlow" - a project management tool for remote teams.

Structure:
- Hero section with headline "Streamline Your Remote Workflow" and CTA button
- Features section with 3 features (visual icons, headings, descriptions)
- Pricing section with 3 tiers (Free, Pro, Enterprise)
- Footer with links and social media icons

Design:
- Modern, clean aesthetic
- Purple (#7C3AED) as primary color
- White background with subtle gradients
- Mobile-responsive design
- Professional typography (Inter font)
- Smooth scroll animations

Features to highlight:
1. Real-time collaboration
2. AI-powered task prioritization
3. Integrated video calls
Step 2: Generate Initial Version
Paste your prompt into Claude (in a new Project or Artifact).
Claude will generate:
- Full HTML structure
- CSS styling with your color scheme
- JavaScript for interactions (smooth scroll, animations)
- Mobile-responsive layout
- SEO meta tags
Step 3: Iterate and Refine
Review the generated code and request changes:
User: "Make the hero section taller with a background gradient from purple to blue"
Claude: [Updates CSS with gradient]

User: "Add customer testimonials section before pricing"
Claude: [Generates testimonials HTML/CSS]

User: "Make pricing cards flip on hover to show feature details on the back"
Claude: [Implements 3D flip animation with CSS]
Step 4: Export and Test
- Copy the complete code from Claude
- Save as
index.html - Open in browser to test
- Test on mobile (browser dev tools)
- Check all links and CTAs work
Step 5: Deploy
Deploy to Netlify (free):
# Install Netlify CLI
npm install -g netlify-cli

# Deploy
netlify deploy --prod

# Follow prompts, drag/drop your HTML file
Your website is now live with a *.netlify.app URL!
Sources: SynarionIT Tutorial, Bearmybrand Complete Guide
Project 2: Multi-Page Website with Navigation
Objective: Build a complete website with multiple pages, shared navigation, and consistent styling.
Step 1: Plan Site Structure
Website: "TechBlog" - A technology blog

Pages:
1. Home (index.html) - Hero, latest posts, featured content
2. About (about.html) - Team info, mission statement
3. Blog (blog.html) - Blog post archive with filters
4. Contact (contact.html) - Contact form with validation
5. Privacy (privacy.html) - Privacy policy

Shared Components:
- Header navigation (logo, menu, search)
- Footer (links, newsletter signup, social media)
- Consistent color scheme and typography
Step 2: Generate Shared Components First
Prompt to Claude:

"Create a reusable header and footer for a tech blog website called TechBlog.

Header should include:
- Logo (text-based: "TechBlog" in bold)
- Navigation menu: Home, About, Blog, Contact
- Search icon button
- Mobile hamburger menu

Footer should include:
- Quick links (same as nav + Privacy)
- Newsletter signup form
- Social media icons (Twitter, LinkedIn, GitHub)
- Copyright notice

Style: Modern, minimal, dark mode friendly
Colors: #1F2937 (dark gray), #10B981 (accent green)
Make it responsive and mobile-friendly"
Step 3: Generate Each Page
For each page, reference the shared components:
"Using the header and footer from our previous conversation, create the Home page for TechBlog.

Home page should have:
- Hero section with tagline and featured image
- 'Latest Posts' section showing 6 recent blog post cards
- 'Featured Topics' section with 4 topic categories
- 'Newsletter' CTA section

Each blog post card should show:
- Featured image
- Title
- Excerpt (2 lines)
- Author, date, read time
- Tags

Make it fully responsive and include hover effects on cards"
Step 4: Create Blog Post Template
"Create a blog post page template (blog-post.html) that matches our TechBlog design.

Include:
- Full-width hero image
- Title, author info, publish date, read time
- Table of contents (auto-generated from H2 headings)
- Article content area with good typography
- Code syntax highlighting blocks
- Social share buttons (Twitter, LinkedIn, Facebook)
- 'Related Posts' section at bottom
- Comments section placeholder

Make the content area comfortable to read (max-width 65ch, good line-height)"
Step 5: Link Pages Together
Ask Claude to:
- Update navigation links to point to correct pages
- Ensure consistent styling across all pages
- Add breadcrumbs where appropriate
- Implement active nav state (current page highlighted)
Step 6: Test Navigation Flow
- Export all HTML files
- Create folder structure:
snippet
techblog/ ├── index.html ├── about.html ├── blog.html ├── contact.html ├── privacy.html ├── blog-post.html ├── css/ │ └── style.css ├── js/ │ └── main.js └── images/ └── (your images) - Open index.html in browser
- Click through all navigation links
- Verify consistent styling
- Test mobile menu
Step 7: Deploy
Deploy entire folder to Netlify or Vercel:
netlify deploy --prod --dir=techblog
Sources: ReadyTo.AI Tutorial, Medium Free Hosting Guide
Project 3: React Application with State Management
Objective: Build an interactive React application - a task management app.
Step 1: Define App Requirements
Create a React task management application called "TaskMaster"

Features:
- Add new tasks with title and description
- Mark tasks as complete/incomplete
- Filter tasks (All, Active, Completed)
- Delete tasks
- Edit existing tasks (inline editing)
- Local storage persistence (tasks saved in browser)
- Task count statistics
- Dark/light mode toggle

UI Components:
- App wrapper (main container)
- Header (title, dark mode toggle)
- TaskInput (form to add tasks)
- TaskList (list of all tasks)
- TaskItem (individual task with actions)
- FilterButtons (All/Active/Completed)
- Stats (total tasks, completed count, active count)

Styling:
- Modern design with Tailwind CSS (via CDN)
- Smooth transitions and hover effects
- Mobile responsive
- Accessible (ARIA labels, keyboard navigation)
Step 2: Generate React App
Claude will generate a complete single-file React app:
// Claude generates this structure:

import React, { useState, useEffect } from 'react';
import ReactDOM from 'react-dom';

function TaskMaster() {
  const [tasks, setTasks] = useState([]);
  const [filter, setFilter] = useState('all');
  const [darkMode, setDarkMode] = useState(false);

  // Load tasks from localStorage on mount
  useEffect(() => {
    const saved = localStorage.getItem('tasks');
    if (saved) setTasks(JSON.parse(saved));
  }, []);

  // Save tasks to localStorage whenever they change
  useEffect(() => {
    localStorage.setItem('tasks', JSON.stringify(tasks));
  }, [tasks]);

  const addTask = (task) => { /* ... */ };
  const toggleTask = (id) => { /* ... */ };
  const deleteTask = (id) => { /* ... */ };
  const editTask = (id, newText) => { /* ... */ };

  const filteredTasks = tasks.filter(task => {
    if (filter === 'active') return !task.completed;
    if (filter === 'completed') return task.completed;
    return true;
  });

  return (
    <div className={darkMode ? 'dark' : ''}>
      <div className="min-h-screen bg-white dark:bg-gray-900">
        {/* Header, TaskInput, FilterButtons, TaskList, Stats */}
      </div>
    </div>
  );
}

ReactDOM.render(<TaskMaster />, document.getElementById('root'));
Step 3: Iterate on Features
Add enhancements:
User: "Add drag-and-drop reordering for tasks"
Claude: [Implements drag-and-drop with HTML5 drag API]

User: "Add task categories with color coding"
Claude: [Adds category selection and visual indicators]

User: "Add due dates with calendar picker"
Claude: [Implements date picker and overdue highlighting]

User: "Add export to JSON feature"
Claude: [Adds export button and download functionality]
Step 4: Optimize Performance
Ask Claude to optimize:
"Optimize this React app for performance:
- Use React.memo for TaskItem components
- Implement useMemo for filtered tasks calculation
- Add debouncing to task search
- Lazy load task lists with virtualization if > 100 tasks"
Step 5: Export and Set Up Locally
- Create project folder
- Save React code as
index.html(with CDN links) - Or set up proper React project:
npx create-react-app taskmaster
cd taskmaster

# Replace src/App.js with Claude's code (adapted for modules)
# Run development server
npm start
Step 6: Build for Production
# Build optimized bundle
npm run build

# Deploy to Netlify
netlify deploy --prod --dir=build
Sources: Python in Plain English - Full-Stack Dev, HTML.to.Design Tutorial
Project 4: Full-Stack Application with Backend
Objective: Build a complete full-stack application - a note-taking app with database.
Step 1: Define Full Architecture
Build a full-stack note-taking application called "QuickNotes"

Frontend (React):
- User authentication (login/signup)
- Note editor with rich text (bold, italic, lists)
- Note list with search and filters
- Tags for organizing notes
- Real-time auto-save
- Dark mode

Backend (Node.js + Express):
- RESTful API endpoints
- User authentication with JWT
- PostgreSQL database integration
- CRUD operations for notes
- Tag management
- Search functionality

Database Schema:
- Users table (id, email, password_hash, created_at)
- Notes table (id, user_id, title, content, created_at, updated_at)
- Tags table (id, user_id, name)
- Note_Tags table (note_id, tag_id)

Deployment:
- Frontend: Vercel
- Backend: Railway or Render
- Database: Railway PostgreSQL
Step 2: Generate Backend First
"Create a Node.js Express backend for QuickNotes with:

1. User authentication:
   - POST /api/auth/signup - Create new user
   - POST /api/auth/login - Login and return JWT
   - Middleware to verify JWT on protected routes

2. Notes API:
   - GET /api/notes - Get all notes for authenticated user
   - GET /api/notes/:id - Get specific note
   - POST /api/notes - Create new note
   - PUT /api/notes/:id - Update note
   - DELETE /api/notes/:id - Delete note

3. Tags API:
   - GET /api/tags - Get all tags
   - POST /api/tags - Create tag
   - PUT /api/notes/:id/tags - Update note tags

Use PostgreSQL with pg library. Include:
- Password hashing with bcrypt
- JWT token generation
- Input validation
- Error handling
- CORS configuration
- Environment variables for secrets"
Claude will generate server.js with all endpoints.
Step 3: Generate Database Setup
"Create database schema and migration files for QuickNotes using PostgreSQL.

Include:
- Schema definition SQL
- Migration scripts
- Seed data for testing
- Database connection configuration
- Indexes for performance (user_id, created_at, etc.)"
Step 4: Generate Frontend
"Create a React frontend for QuickNotes that connects to our backend API.

Components:
- AuthForm (login/signup with toggle)
- Dashboard (main app container)
- NoteEditor (rich text editor with formatting toolbar)
- NoteList (sidebar with search and filter)
- TagManager (tag creation and assignment)
- Settings (theme toggle, account settings)

Features:
- JWT token storage in localStorage
- Axios for API requests
- React Router for navigation
- Context API for global state (user, notes, tags)
- Debounced auto-save (save 2 seconds after typing stops)
- Optimistic UI updates
- Loading states and error handling

Use Tailwind CSS and include dark mode support"
Step 5: Connect Frontend to Backend
Ask Claude to:
- Generate API service layer (api.js)
- Implement authentication flow
- Add request interceptors for JWT
- Handle token refresh
- Implement error handling
// Generated API service example
import axios from 'axios';

const API_URL = process.env.REACT_APP_API_URL || 'http://localhost:5000/api';

const api = axios.create({
  baseURL: API_URL,
  headers: {
    'Content-Type': 'application/json'
  }
});

// Add JWT to all requests
api.interceptors.request.use(config => {
  const token = localStorage.getItem('token');
  if (token) {
    config.headers.Authorization = `Bearer ${token}`;
  }
  return config;
});

export const authService = {
  signup: (email, password) => api.post('/auth/signup', { email, password }),
  login: (email, password) => api.post('/auth/login', { email, password })
};

export const notesService = {
  getAll: () => api.get('/notes'),
  getById: (id) => api.get(`/notes/${id}`),
  create: (note) => api.post('/notes', note),
  update: (id, note) => api.put(`/notes/${id}`, note),
  delete: (id) => api.delete(`/notes/${id}`)
};

export const tagsService = {
  getAll: () => api.get('/tags'),
  create: (name) => api.post('/tags', { name }),
  updateNoteTags: (noteId, tagIds) => api.put(`/notes/${noteId}/tags`, { tagIds })
};
Step 6: Set Up Environment Variables
Backend .env:
PORT=5000
DATABASE_URL=postgresql://user:password@host:5432/quicknotes
JWT_SECRET=your-secret-key-here
NODE_ENV=production
CORS_ORIGIN=https://your-frontend-domain.vercel.app
Frontend .env:
REACT_APP_API_URL=https://your-backend.railway.app/api
Step 7: Deploy
Deploy backend to Railway:
# Install Railway CLI
npm install -g @railway/cli

# Login and initialize
railway login
railway init

# Add PostgreSQL
railway add postgresql

# Deploy
railway up
Deploy frontend to Vercel:
# Install Vercel CLI
npm install -g vercel

# Deploy
vercel --prod
Step 8: Test End-to-End
- Create account on deployed frontend
- Create several notes
- Add tags
- Test search and filters
- Verify auto-save works
- Test dark mode toggle
- Logout and login to verify persistence
Sources: DataCamp Claude Code Tutorial, PyDevTools Complete Guide
Best Practices for Vibe Coding with Claude
1. Write Clear, Detailed Prompts
Bad Prompt:
"Make a website"
Good Prompt:
"Create a landing page for a fitness coaching business called 'FitLife Coaching'.

Target audience: Working professionals aged 25-40
Goal: Generate leads for 1-on-1 coaching

Structure:
- Hero with headline 'Transform Your Body in 12 Weeks' and email capture form
- 'How It Works' section (3 steps with icons)
- Testimonials (3 cards with before/after photos, quotes, names)
- Pricing (2 options: Standard $297/month, Premium $497/month)
- FAQ accordion (5 common questions)
- Footer with social links

Design:
- Energetic, motivating vibe
- Orange (#FF6B35) and dark blue (#003566) color scheme
- High-energy imagery (people exercising)
- Mobile-first design
- Fast loading (optimize images)

Include:
- Google Analytics integration
- Facebook Pixel
- Schema markup for SEO
- Accessibility (ARIA labels, alt text)"
2. Iterate Incrementally
Don't ask for everything at once. Build iteratively:
1. "Create basic structure and layout"
   → Review output

2. "Add hero section with form"
   → Test form functionality

3. "Add testimonials section with carousel"
   → Verify carousel works on mobile

4. "Add pricing section with hover effects"
   → Check animations

5. "Optimize for mobile and add loading states"
   → Final testing
3. Provide Examples and References
Show Claude what you want:
"Create a navigation bar similar to Stripe.com:
- Logo on the left
- Center menu items (Products, Solutions, Developers, Resources)
- Right side: Login and Sign Up buttons
- Sticky on scroll
- Mega menu dropdowns for Products and Solutions
- Search modal when clicking search icon

Here's a screenshot: [attach image]
Match the spacing and animation style"
4. Specify Technologies and Versions
Be explicit about your stack:
"Build this using:
- React 18.3 with hooks (no class components)
- Tailwind CSS 3.4 for styling
- React Router 6 for navigation
- Axios for API calls
- React Hook Form for form handling
- Zod for validation
- Lucide React for icons

Use TypeScript for type safety
Follow Airbnb style guide for code formatting"
5. Ask for Explanations
Understand the code Claude generates:
"Explain how this authentication flow works step-by-step.
Why did you use useContext instead of Redux?
What security measures are in place for the JWT tokens?
How does the auto-save feature prevent data loss?"
6. Request Testing and Error Handling
"Add comprehensive error handling:
- Network errors (show retry button)
- Validation errors (show field-specific messages)
- Server errors (show user-friendly message)
- Loading states for all async operations
- Empty states when no data
- Success confirmations for user actions

Also add:
- Unit tests for utility functions
- Integration tests for API calls
- E2E tests for critical user flows"
7. Optimize for Performance
"Optimize this React app for performance:
- Code splitting with React.lazy
- Image optimization (WebP, lazy loading)
- Memoization for expensive calculations
- Virtual scrolling for long lists
- Service worker for offline support
- Bundle size analysis and reduction
- Lighthouse score > 90 for all metrics"
8. Maintain Consistency
Use Claude Projects with custom instructions:
In Project Settings, add custom instructions:

"For all components in this project:
- Use Tailwind CSS classes (no inline styles)
- Follow our design system colors: primary #7C3AED, secondary #10B981
- Use Inter font family
- Ensure mobile-first responsive design
- Include TypeScript types
- Add PropTypes for runtime validation
- Include JSDoc comments for all functions
- Follow our component structure:
  - Imports
  - Type definitions
  - Component code
  - Export
  - Styled components (if needed)"
Common Challenges and Solutions
Challenge 1: Code Doesn't Work as Expected
Symptoms:
- Errors in console
- Unexpected behavior
- Missing functionality
Solutions:
-
Share the Error:
snippet"I'm getting this error: Uncaught TypeError: Cannot read property 'map' of undefined at TaskList (TaskList.js:23) Here's line 23: {tasks.map(task => <TaskItem key={task.id} task={task} />)} What's wrong and how do I fix it?" -
Provide Context:
snippet"The submit button isn't working. When I click it, nothing happens. No console errors. Here's the form component: [paste code]" -
Test Incrementally:
snippet"Let's debug this step by step: 1. Add console.log to verify function is called 2. Check if form data is captured correctly 3. Verify API endpoint is reachable 4. Confirm response is handled properly"
Challenge 2: Styling Doesn't Match Vision
Solutions:
-
Use Visual References:
- Attach screenshots
- Link to similar websites
- Describe colors with hex codes
- Specify exact spacing and sizes
-
Iterate on Design:
snippet"The hero section needs adjustments: - Increase heading font size to 64px - Change background to gradient from #667eea to #764ba2 - Add subtle animation when page loads - Make CTA button larger and more prominent" -
Use Design Systems:
snippet"Follow Material Design spacing: - 8px baseline grid - Typography scale: 12, 14, 16, 20, 24, 32, 48, 64 - Elevation shadows for cards - 4px border radius for buttons, 8px for cards"
Challenge 3: Mobile Responsiveness Issues
Solutions:
"Make this fully responsive with these breakpoints:
- Mobile: < 640px (stack all elements vertically)
- Tablet: 640px - 1024px (2-column grid)
- Desktop: > 1024px (3-column grid)

Specific adjustments:
- Hero text: 32px mobile, 48px tablet, 64px desktop
- Navigation: hamburger menu on mobile, full menu on desktop
- Images: full-width on mobile, 50% width on desktop
- Padding: 16px mobile, 32px tablet, 64px desktop"
Challenge 4: Performance Problems
Symptoms:
- Slow loading
- Laggy interactions
- High bundle size
Solutions:
"Optimize this application for performance:

1. Code Splitting:
   - Split routes into separate bundles
   - Lazy load non-critical components

2. Image Optimization:
   - Convert to WebP format
   - Implement responsive images (srcset)
   - Add lazy loading
   - Use appropriate sizes (no oversized images)

3. Bundle Optimization:
   - Remove unused dependencies
   - Tree shake effectively
   - Minimize and compress
   - Analyze bundle with webpack-bundle-analyzer

4. Runtime Performance:
   - Memoize expensive calculations
   - Virtualize long lists
   - Debounce input handlers
   - Use web workers for heavy computations

Target: < 3s load time on 3G, Lighthouse score > 90"
Deployment Strategies
Option 1: Netlify (Best for Static Sites)
Steps:
-
Prepare Site:
bash# Folder structure my-website/ ├── index.html ├── about.html ├── css/ ├── js/ └── images/ -
Create netlify.toml:
toml[build] publish = "." command = "echo 'No build needed for static site'" [[redirects]] from = "/*" to = "/index.html" status = 200 force = false [[headers]] for = "/*" [headers.values] X-Frame-Options = "DENY" X-XSS-Protection = "1; mode=block" X-Content-Type-Options = "nosniff" -
Deploy:
bashnetlify deploy --prod --dir=. -
Custom Domain (Optional):
- Go to Netlify dashboard
- Domain settings
- Add custom domain
- Update DNS records
Netlify Features:
- Automatic HTTPS
- Continuous deployment from Git
- Form handling
- Serverless functions
- A/B testing
- Free tier: 100GB bandwidth/month
Option 2: Vercel (Best for React/Next.js)
Steps:
-
Initialize Project:
bashnpx create-next-app my-app cd my-app -
Build and Test:
bashnpm run build npm run start -
Deploy:
bashvercel --prod -
Environment Variables:
bashvercel env add NEXT_PUBLIC_API_URL production
Vercel Features:
- Edge network (global CDN)
- Automatic code splitting
- Image optimization
- Analytics
- Preview deployments for pull requests
- Free tier: Unlimited sites
Option 3: Railway (Best for Full-Stack)
Steps:
-
Install CLI:
bashnpm install -g @railway/cli railway login -
Initialize Project:
bashrailway init -
Add Services:
bash# Add PostgreSQL database railway add postgresql # Deploy backend railway up -
Environment Variables:
bashrailway variables set DATABASE_URL=$DATABASE_URL railway variables set JWT_SECRET=your-secret
Railway Features:
- Managed databases (PostgreSQL, MySQL, MongoDB, Redis)
- Automatic deployments from Git
- Built-in metrics and logs
- Environment variable management
- Free tier: $5 credit/month
Option 4: GitHub Pages (Free Static Hosting)
Steps:
-
Create Repository:
bashgit init git add . git commit -m "Initial commit" git branch -M main git remote add origin https://github.com/username/repo-name.git git push -u origin main -
Enable GitHub Pages:
- Go to repository Settings
- Pages section
- Source: main branch
- Folder: / (root) or /docs
-
Custom Domain (Optional):
- Add CNAME file with your domain
- Configure DNS A records to GitHub IPs
GitHub Pages Features:
- Free for public repositories
- HTTPS support
- Custom domains
- 100GB bandwidth/month
- 1GB storage
Advanced Topics
Server-Side Rendering with Next.js
"Create a Next.js 14 application with:
- App Router (not Pages Router)
- Server Components by default
- Client Components where needed (use 'use client')
- API Routes in app/api directory
- Dynamic routing with catch-all routes
- Metadata API for SEO
- Streaming with Suspense
- Server Actions for form handling

Example structure:
app/
├── layout.tsx (root layout)
├── page.tsx (home page)
├── about/page.tsx
├── blog/
│   ├── page.tsx (blog list)
│   └── [slug]/page.tsx (individual post)
├── api/
│   └── posts/route.ts
└── components/
    ├── Header.tsx (Server Component)
    └── SearchBar.tsx (Client Component with 'use client')"
Database Integration with Prisma
"Set up Prisma ORM for our Next.js app:

1. Install and initialize:
   npm install prisma @prisma/client
   npx prisma init

2. Define schema (schema.prisma):
   - User model (id, email, password, createdAt)
   - Post model (id, title, content, userId, published, createdAt)
   - Comment model (id, content, postId, userId, createdAt)
   - Relations: User -> Posts, User -> Comments, Post -> Comments

3. Create migration:
   npx prisma migrate dev --name init

4. Generate Prisma Client:
   npx prisma generate

5. Create database utilities (lib/db.ts):
   - Singleton Prisma Client instance
   - Helper functions for common queries

6. Implement CRUD operations:
   - Create post
   - Get all posts
   - Get post by ID
   - Update post
   - Delete post

Use TypeScript for type safety with Prisma's generated types"
Authentication with NextAuth.js
"Implement authentication using NextAuth.js:

1. Install:
   npm install next-auth @next-auth/prisma-adapter

2. Create [...nextauth]/route.ts:
   - Providers: Google, GitHub, Email
   - Prisma adapter for database sessions
   - JWT strategy
   - Session callback to include user data

3. Add authentication pages:
   - /signin (custom sign-in page)
   - /signup (custom registration)
   - /verify-email (email verification)

4. Protect routes:
   - Create middleware.ts to protect /dashboard/*
   - Redirect unauthenticated users to /signin
   - Use getServerSession in Server Components
   - Use useSession in Client Components

5. Add user profile:
   - View profile information
   - Update avatar
   - Change password
   - Delete account

Include proper error handling and loading states"
Real-Time Features with WebSockets
"Add real-time chat to our application using Socket.io:

1. Backend (server.js):
   - Set up Socket.io server
   - Handle connection/disconnection
   - Implement rooms for different channels
   - Broadcast messages to room members
   - Handle typing indicators
   - Store messages in database

2. Frontend (React):
   - Create socket connection context
   - Chat component with message list
   - Message input with send button
   - Real-time message updates
   - Typing indicator ('User is typing...')
   - Online/offline status

3. Features:
   - Message delivery confirmations
   - Read receipts
   - File/image sharing
   - Emoji reactions
   - Message editing and deletion

4. Performance:
   - Paginated message loading
   - Optimistic UI updates
   - Connection recovery
   - Rate limiting

Use TypeScript for type-safe socket events"
Learning Resources & Next Steps
This Week
- Set up Claude Pro account
- Complete Project 1 (Landing Page)
- Deploy first website to Netlify
- Learn basic HTML/CSS/JS concepts
- Join web development communities (Discord, Reddit)
This Month
- Complete Project 2 (Multi-Page Website)
- Build Project 3 (React App)
- Learn React fundamentals
- Set up GitHub for version control
- Start personal portfolio website
This Quarter
- Complete Project 4 (Full-Stack App)
- Learn database concepts (SQL basics)
- Master deployment strategies
- Build 3-5 portfolio projects
- Consider freelancing or job applications
Recommended Learning Path
Week 1-2: Foundations
- HTML/CSS basics
- JavaScript fundamentals
- Vibe coding with Claude
- Deploy static sites
Week 3-4: React & State Management
- React components and hooks
- State management patterns
- Building interactive UIs
- Component libraries (Tailwind, shadcn/ui)
Week 5-6: Full-Stack Development
- Backend with Node.js/Express
- Database integration
- Authentication
- API design
- Deployment
Week 7-8: Advanced Topics
- Next.js and SSR
- Real-time features
- Performance optimization
- Production best practices
Master Web Development in The Complete AI Builder Bootcamp
The Complete AI Builder Bootcamp takes you from zero to full-stack developer in 6 weeks using AI-assisted development.
What You'll Build:
- Week 1-2: AI fundamentals and prompt engineering for development
- Week 3: Claude Projects, Artifacts, and rapid prototyping
- Week 4: Python automation and backend integration
- Week 5: Full-stack web applications with React and databases
- Week 6: Deploy production applications and build your portfolio
Hands-On Projects:
- AI-powered landing pages
- Full-stack note-taking application
- E-commerce product catalog
- Real-time chat application
- Personal portfolio website
- Capstone project of your choice
6 weeks. 12 live sessions. Build 8+ portfolio projects.
Learn from Yash Thakker with personalized feedback, lifetime recording access, and career guidance.
View Full Curriculum & Enroll →
Related Posts
- How to Use Claude Connectors and MCP Servers
- Claude Code for Python Automation: Complete Guide
- Master Prompt Engineering with Claude
- The Agentic Era: AI Agents 2026-2030
- How product managers are actually using AI in 2026 — this prototyping workflow applied to PM work specifically
Sources & References
Comprehensive Guides:
- Leon Furze - Building Websites with Claude Code
- AI Blew My Mind - Complete Website Tutorial
- SynarionIT - Step-by-Step Guide
- Bearmybrand - Vibe Coding Guide
Technical Tutorials:
- ReadyTo.AI - Complete Tutorial
- explainx.ai - No Coding Required
- Python in Plain English - Full-Stack Dev
Deployment Guides:
This comprehensive tutorial covers building full-stack websites with Claude AI as of June 2026. Technologies and best practices evolve rapidly. Always refer to official documentation for the latest updates.